Configuration
idea
Also see the prefs API documentation page!
Guided Configuration
After installation, set Autopilot up! Autopilot comes with a “guided installation” process where you can select the actions you want and they will be run for you. The setup routine will:
install needed system packages
prepare your operating system and environment
set system preferences
create a user directory (default
~/autopilot) to store prefs, logs, data, etc.create a launch script
To start the guided process, run the following line.
python3 -m autopilot.setup
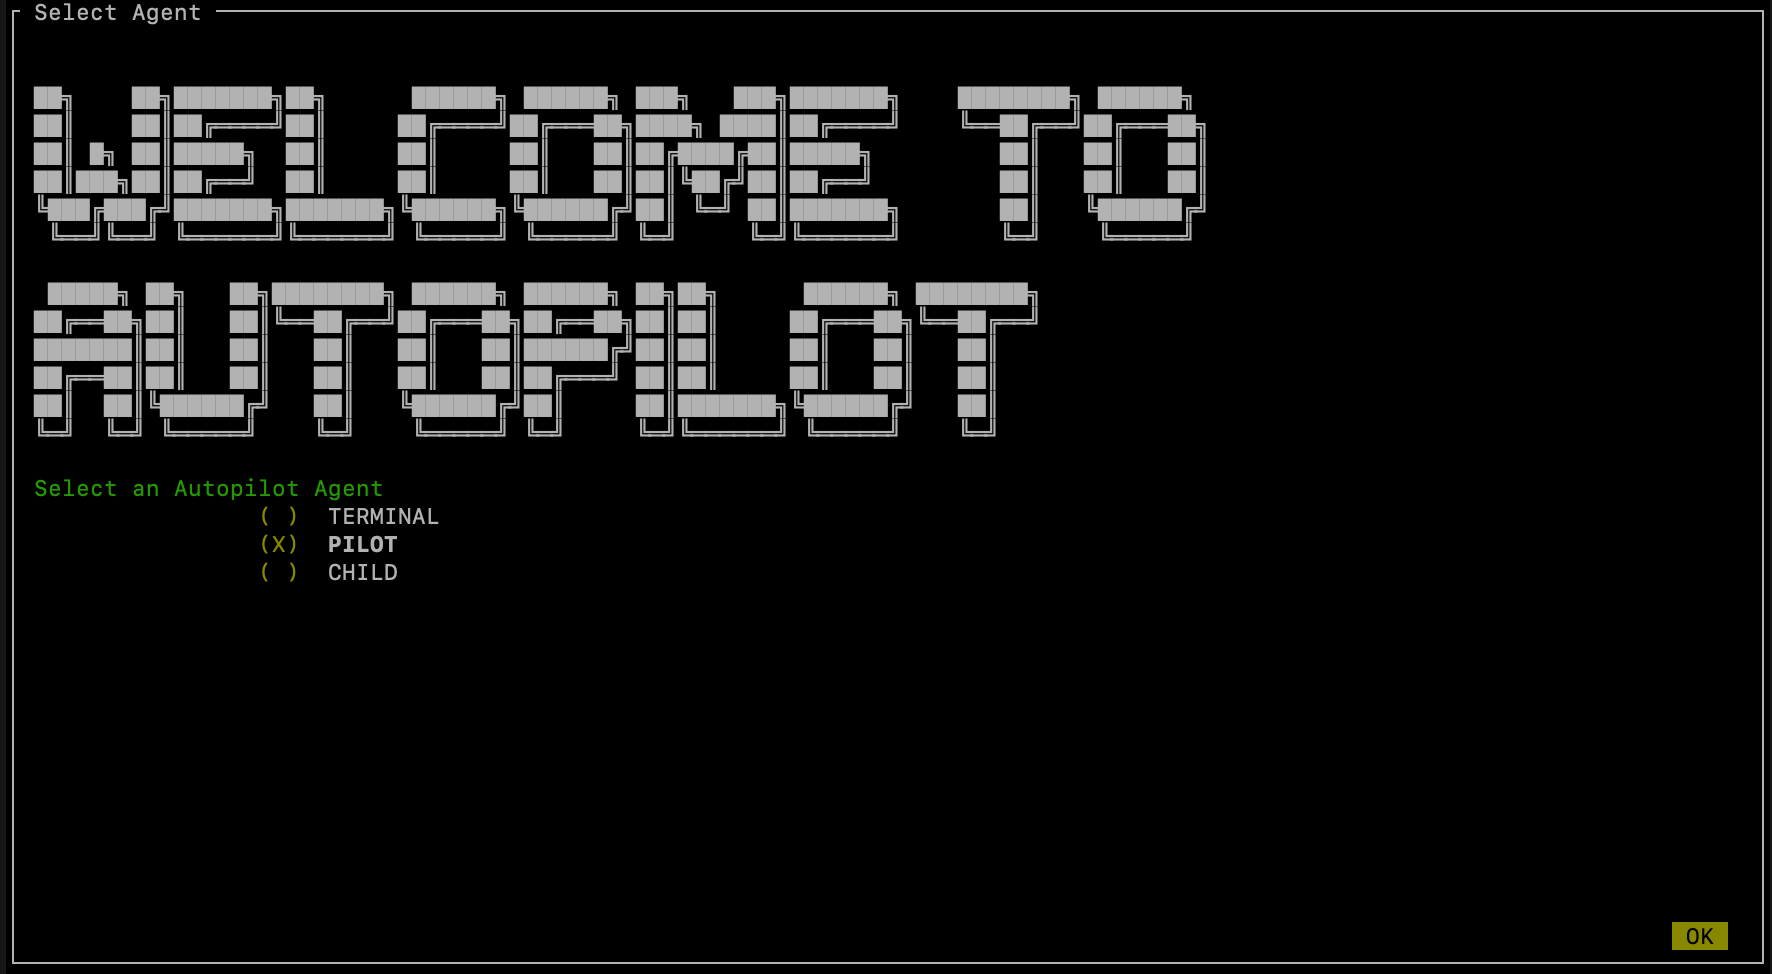
Select Agent
Each runtime of Autopilot is called an “Agent”, each of which performs different roles within a system, and thus have different requirements. If you’re running the setup script on the Pi, select “Pilot”. If you’re running the setup script on a desktop computer, select “Terminal”. If you’re configuring multiple Pis, then select “Child” on the child Pis. Then hit “OK”.
You can navigate this interface with the arrow keys, tab key, and enter key.
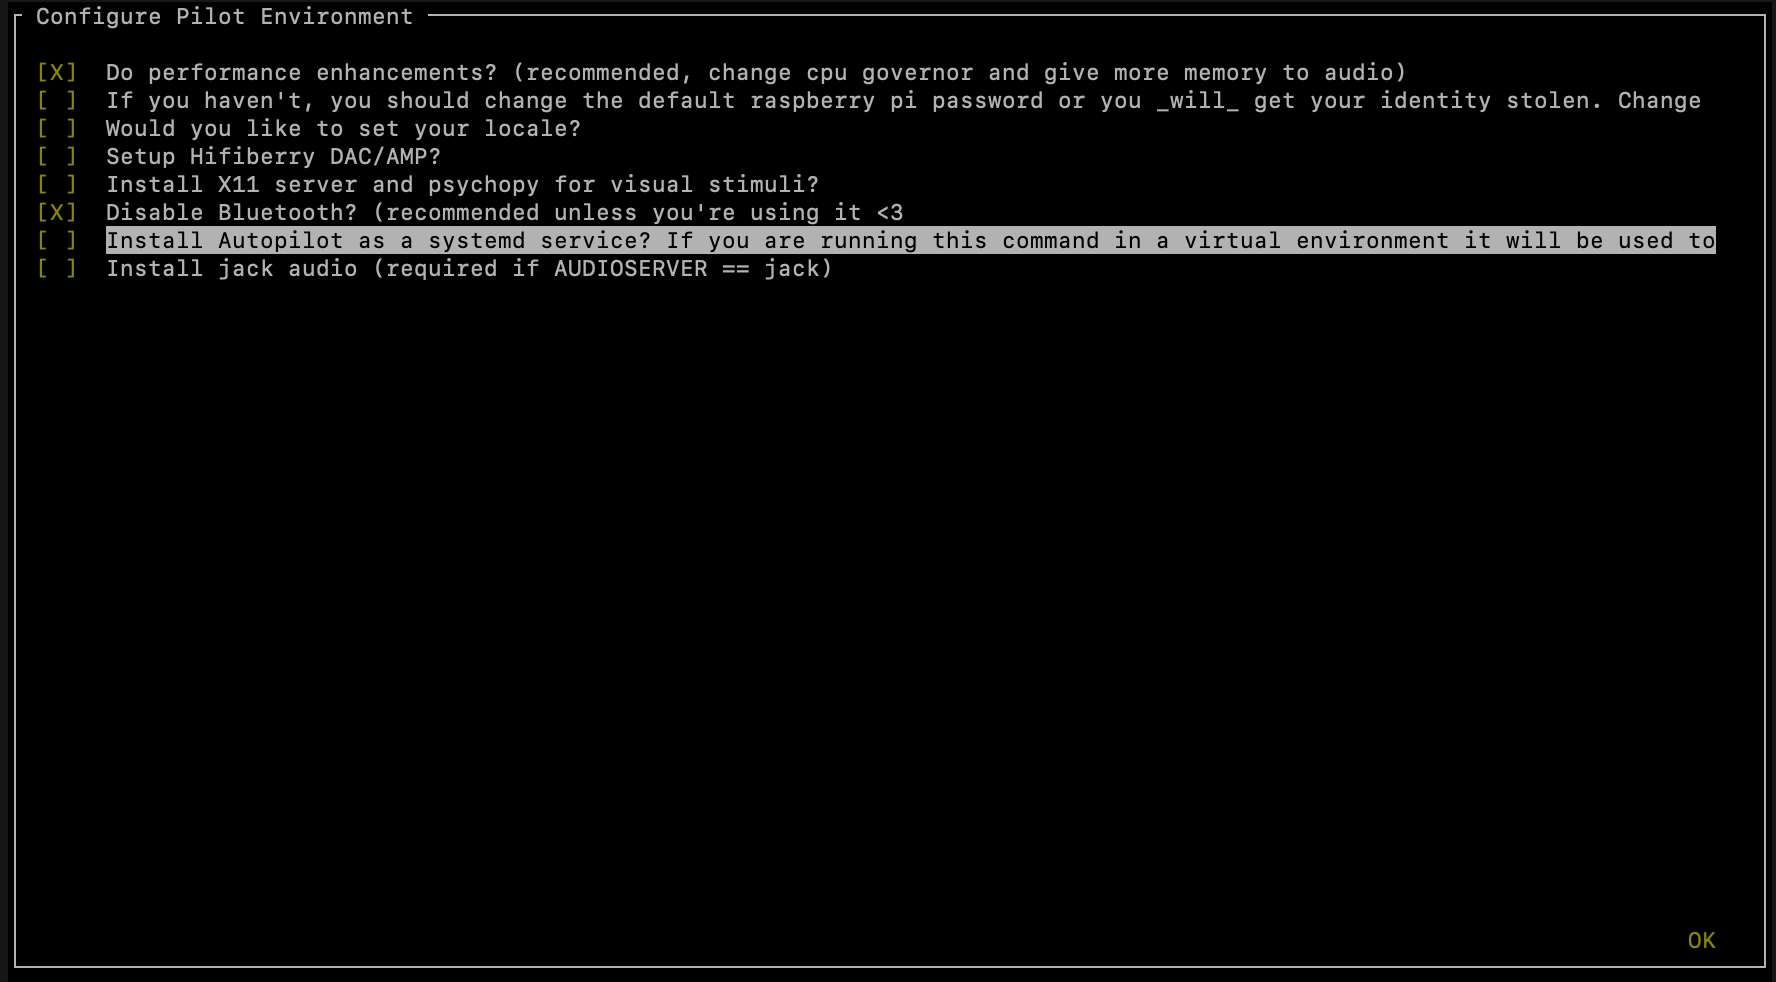
Select scripts
Now you will see a menu of potential scripts that can be run.
Select the scripts you want to run, and then hit “OK”. Note that even the simplest task (“free water”) requires pigpio,
so you may want to include that one. You can see the commands that will be run in each of these scripts with setup.run_script
in the setup.scripts.SCRIPTS dictionary.
Note
Autopilot uses a slightly modified version of pigpio (https://github.com/sneakers-the-rat/pigpio) that allows it to
get absolute timestamps (rather than system ticks) from gpio callbacks, increases the max number of scripts, etc. so
if you have a different version of pigpio installed you will need to remove it and replace it with this one (you can
do so with python -m autopilot.setup.run_script pigpiod
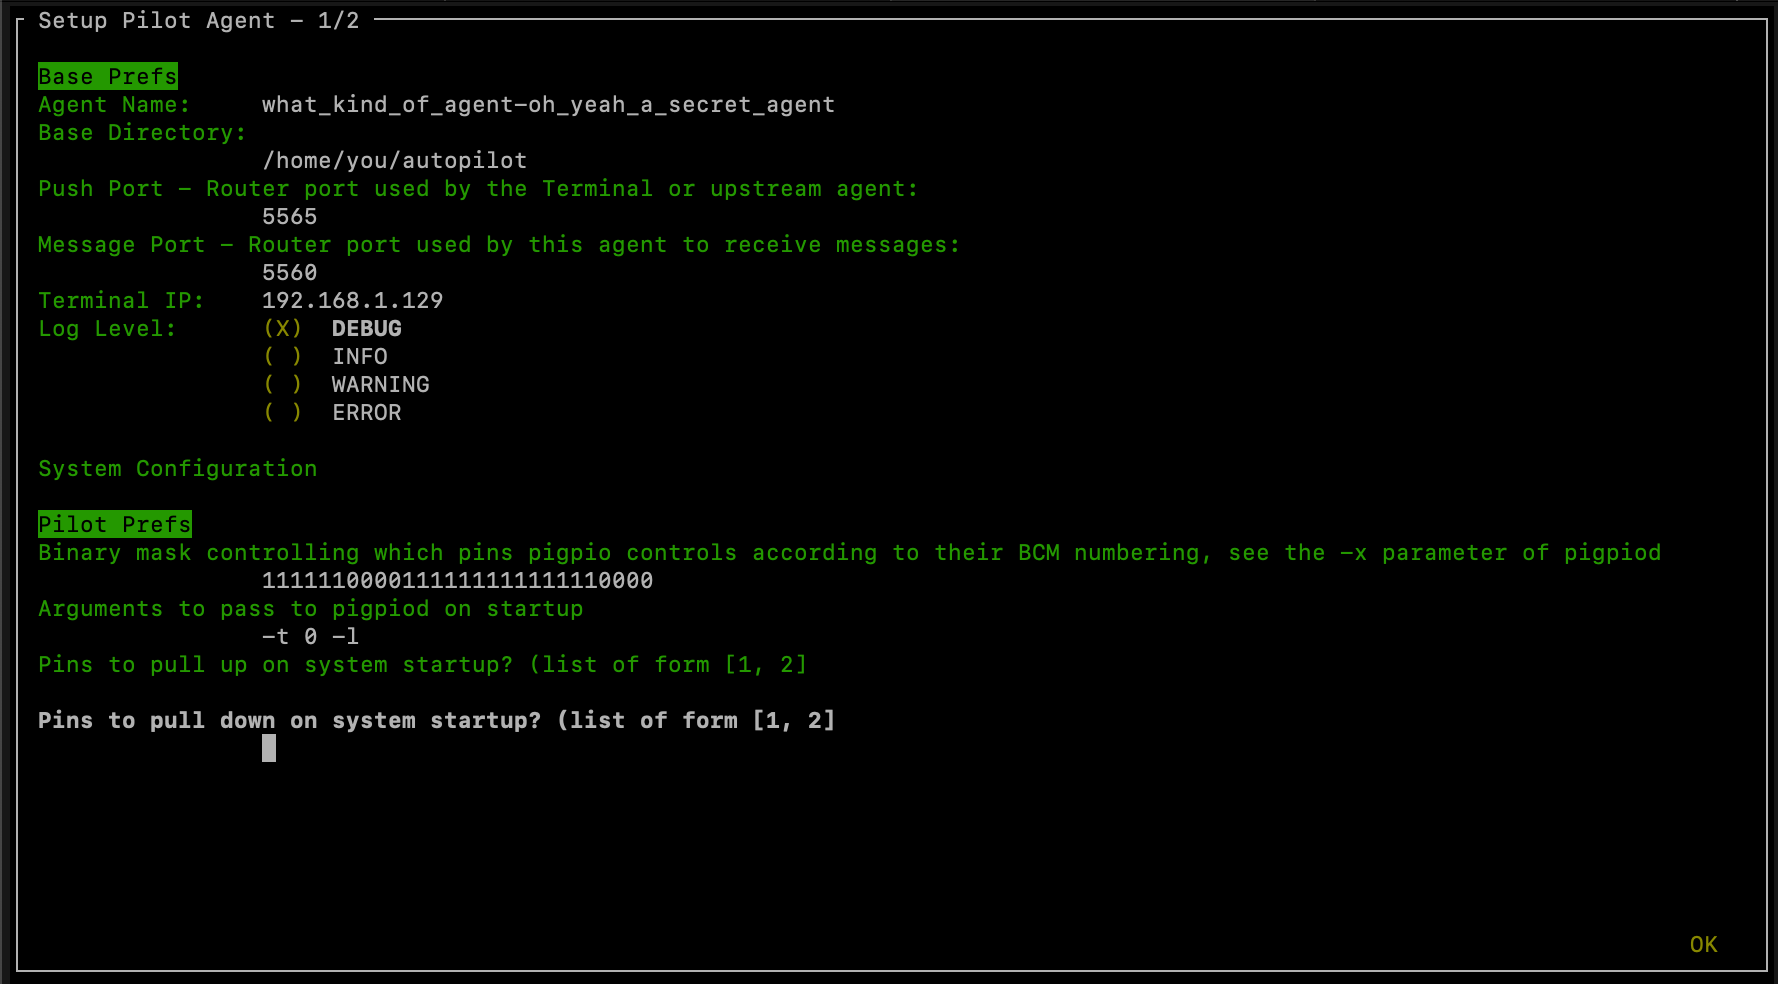
Configure Agent
Each agent has a set of systemwide preferences stored in <AUTOPILOT_DIR>/prefs.json and accessible from autopilot.prefs.
Configure Hardware
If configuring a Pilot, you’ll be asked to configure your hardware.
Press ctrl+x to add Hardware, and fill in the relevant parameters (most are optional and can be left blank).
Consult the relevant page on the docs to see which arguments are relevant and how to use them.
After completing this step, the file prefs.json will be created if necessary and populated with the information you just provided.
If it already exists, it will modified with the new information while preserving the previous preferences.
You can also manually edit the prefs.json file if you prefer. an example prefs file for the Pilot is available that defines the ports, LEDs, and solenoids that are necessary for the “free water” task, which may be a useful way to get started.
Testing the Installation
A launch script should have been created by setup_autopilot at <AUTOPILOT_DIR>/launch_autopilot.sh –
this is the primary entrypoint to autopilot, as it allows certain system-level commands to precede launch (eg.
activating virtual environments, enlarging shared memory, killing conflicting processes, launching an x server, etc.).
To launch autopilot::
~/autopilot/launch_autopilot.sh
Note
Selecting the script alias in setup_autopilot allows you to call the launch script by just typing autopilot
The actual launch call to autopilot resembles:
python3 -m autopilot.agents.<AGENT_NAME> -f ~/autopilot/prefs.json
The User Directory
After configuration, all the files you’ll interact with will be in the user directory - ~/autopilot by default.
An example user directory might look like this:
./autopilot
├── calibration
├── data
│   ├── subject_1.h5
│   └── subject_2.h5
├── launch_autopilot.sh
├── logs
│   ├── agents.terminal.log
│   └── plugins.my_plugin.log
├── pilot_db.json
├── plugins
│   └── my_plugin
│       └── my_task.py
├── prefs.json
├── protocols
│   ├── 2afc_easy.json
│   └── 2afc_hard.json
└── sounds
prefs.json
See the prefs module documentation for documentation of specific preferences
The prefs.json file stores all the configuration options for this particular Autopilot instance, including
configurations of local hardware objects, audio output, etc. Each agent will have its own combination of prefs
determined by :class:.prefs.SCOPES.
pilot_db.json
The pilot_db.json file is used by the Terminal to keep track of which pilots have been configured to
connect to it. For each pilot the Terminal will create a set of widgets (see gui.widgets.terminal) to control it
as well as plots to display data from running tasks.
For each pilot, the db file will contain
subjects- a list ofSubjects that run on that pilot. The Subject class keeps track of which pilot it was assigned to, but at the moment the pilot db file will be used to actually dispatch the task to that pilotip- the last known IP address the pilot has connected fromprefs- the prefs for that pilot
In the future the pilot_db will also track the versions and hashes for autopilot and any plugins running on other pilots
launch_autopilot.sh
A launch script created by setup to launch the configured autopilot agent. Will enable any virtual environment
that is detected when configuring, start and external daemons that need to be started, and explicitly pass the location
of the prefs.json file that determine its operation.
calibration
Calibration files for individual hardware objects identified by group and ID (see configuring hardware
and calibration()).
When the calibration property of any hardware object is set, the dictionary passed is then stored as a .json file.
For example, the Solenoid class stores a calibration generated by menus.tools.Calibrate_Water
that converts an open duration to a volume of fluid dispensed. If a given solenoid’s group and id are PORTS and L,
we’d get a file PORTS_L.json that looks like:
{
  "intercept": 2.667731629392975,
  "slope": 5.591054313099041
}
data
Each Subject has a corresponding .h5 file that stores its history, biographical information,
and data collected during tasks. The data directory is searched in by default for a subject’s .h5 file, so it is possible
to access a subject’s data by just instantiating the subject object with its ID (ie. Subject(subject_id)) rather
than passing its full location. To use the subject class with data outside the data directory pass the containing directory
as the dir argument.
logs
Many (and eventually all) autopilot objects have a logger attribute created with init_logger()
like self.logger = init_logger(self) that inspects the object to create a logger based on its module and id.
Logfiles are created for each module, and then if an object has a name or id attribute it will be used in
each log message to identify the source. Logfiles are also created for any classes run as separate processes
(like JackClient) because separate processes can’t write to the same file without
overwriting each other. Logfiles are also rotated using suffixes like .1, .2 to keep individual log files
manageable and browsable by typical text editors while maintaining as much history as is desired.
Logs are written to stdout using the rich.logging.RichHandler for greater interpretability:
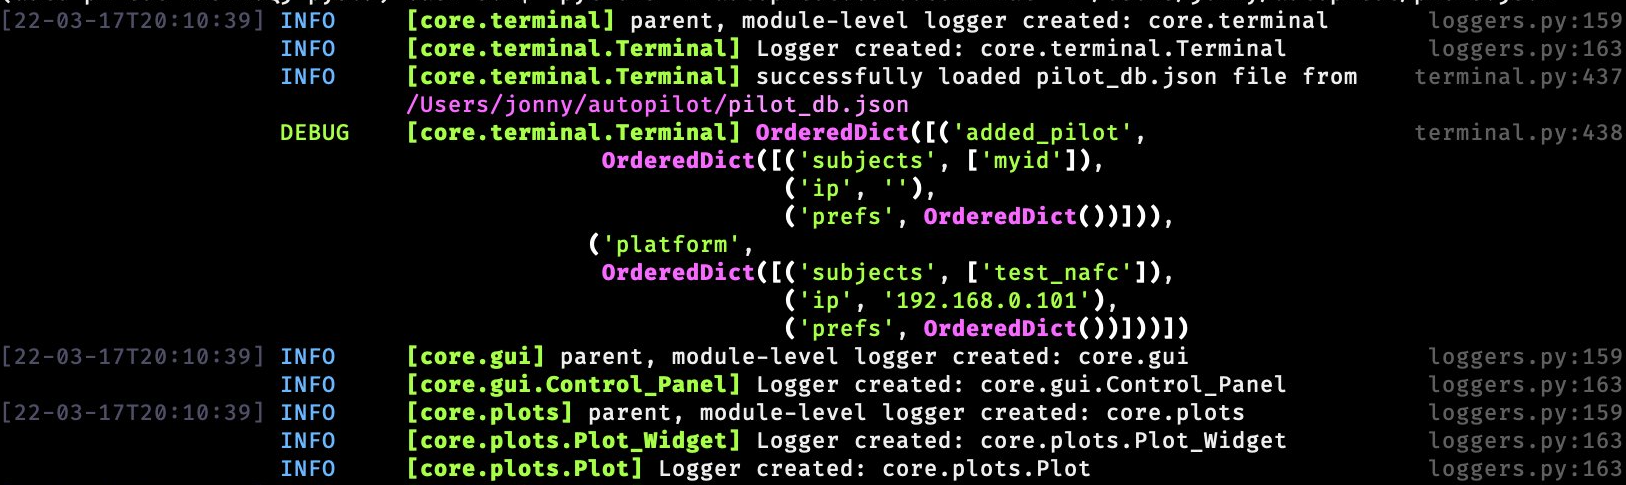
Since logs take time to write to both stdout and to files, we recommend keeping your log level to INFO or WARNING
during normal operation — where we assume performance is usually a priority. the DEBUG mode will print a huge number
of messages, including every network transaction, etc.
Logging is configured using a few prefs:
LOGLEVEL- All messages above this loglevel will be written to file and stdout, possible options are:DEBUG- Detailed information about system operation to fix problemsINFO- Information about major operations that don’t require any special attention but are good to know when they happenWARNING- Warnings that don’t break system operation but might make recommendations, alert the user about implicit or automatic activity that might not be desirable, etc.ERROR- Errors that prevent normal system operation, but have been handled in such a way that the whole process hasn’t crashed.
LOGSIZE- The maximum size of an individual logfile (in bytes), the default being 5MBLOGNUM- The number of rotating logfiles of sizeLOGSIZEto keep
When running autopilot as a systemd daemon, you can access stderr logs that are not caught by the logger because they are
unexpected or otherwise outside normal system operation by using journalctl -u autopilot, or to just see the end use the -e flag.
plugins
See the Using Plugins documentation, as well as the plugins and registry modules.
Plugins are where you do your work!
Plugins contain additional Task, Hardware, or other autopilot types (see REGISTRIES)
that can be accessed by the registry.get() function to extend the basic functionality of autopilot. We recommend
making plugins as versioned subfolders within the plugin directory to keep track of changes and make the easier to share,
but at the moment there is no restriction on their structure.
Plugins will be automatically imported if the AUTOPLUGIN pref is set to True. Autopilot will attempt to import each
file within the plugin directory, but since plugins can contain scripts or other files not intended to extend autopilot,
may log a number of exceptions which can be ignored, but provide details about where each plugin is failing to import.
protocols
See the models.protocol.Step_Data and models.protocol.Protocol_Data classes, as well
as the :class:.Protocol_Wizard which creates them.
Each Protocol consists of a list of parameter dictionaries for a number of individual tasks with graduation criteria for
moving between them. Protocols within the protocol directory can be assigned (:meth:.Subject.assign_protocol)
by name (filename excluding .json), and the representation of the protocol stored within the Subject file
is updated when it detects that the protocol file has changed.
sounds
Sound files used by the :class:sounds.File class, transferred to pilots when used in a task.
Networking
Note
Networking is a point of major future development, particularly how agents discover one another and how ports are assigned. Getting networking to work is still a bit cumbersome, but you can track progress or contribute to improving networking at issue #48
IP Addresses
Pilots connect to a terminal whose IP address is specified as TERMINALIP in prefs.json
The Pilot and Terminal devices must be on the same network and capable of reaching one another.
You can get your local IP with ifconfig -a or ip addr
Let’s say your Terminal is at 192.168.1.42 and your Pilot is at 192.168.1.200. Replace these values with whatever you actually found before.
Then, you can test that each device can see the other with ping. On the Terminal, run::
ping 192.168.1.200
And on the Pilot, run::
ping 192.168.1.42
If that doesn’t work, there is something preventing the computers from communicating from one another, typically this is the case if the computers are on university/etc. internet that makes it difficult for devices to connect to one another. We recommend networking agents together using a local router or switch (though some have reported being able to use their smartphone’s hotspot in a pinch.
Ports
Agents use two prefs to configure their ports
MSGPORTis the port that the agent receives messages onPUSHPORTis the port of the ‘upstream’ agent that it connects to.
So, if connecting a Pilot to a Terminal, the PUSHPORT of the Pilot should match the MSGPORT of the Terminal.
Ports need to be “open,” but the central operation of a firewall is to “close” them. To open a port if, for example,
you are using ufw on ubuntu (replacing with whatever port you’re trying to open to whatever ip address)::
sudo ufw allow from 192.168.1.200 to any port 5560