Installation
Autopilot is able to configure your system packages and environment after installation, but if you want to manually install system dependencies there are dependency lists near the bottom of this page.
Environment Preparation
Raspberry Pi
For Pilots, we recommend starting with a fresh Raspbian Lite image (see the raspi installation documentation
Then you’ll need to update and install the necessary system packages (also available as a setup script in the guided installation phase):
sudo apt update && sudo apt upgrade -y
sudo apt install -y \
    python3-dev \
    python3-pip \
    git \
    libatlas-base-dev \
    libsamplerate0-dev \
    libsndfile1-dev \
    libreadline-dev \
    libasound-dev \
    i2c-tools \
    libportmidi-dev \
    liblo-dev \
    libhdf5-dev \
    libzmq-dev \
    libffi-dev
Installation with pip
If you’re just taking a look at Autopilot, the easiest way to get started is to install with pip!:
pip3 install auto-pi-lot
Note
I’m just figuring out python packaging and this is a pretty complicated one to package! please submit issues if the pip install isn’t working!
Installation from git
If you want to start writing your own experiments and tinkering with Autopilot, we strongly recommend forking the repository and developing directly in the library so your gorgeous insights can be integrated later.
git clone https://github.com/wehr-lab/autopilot.git
pip3 install -e ./autopilot/
Note
Depending on your permissions, eg. if you are not installing to a virtual environment, you may get a permissions error and need to install with the --user flag
Configuration
Note
If you didn’t install the system dependencies yet, you can do so now with
python3 -m autopilot.setup.run_script env_pilot
After installation, set Autopilot up!
The setup routine will
install needed system packages
prepare your operating system and environment
set system preferences
create a user directory (default
~/autopilot) to store prefs, logs, data, etc.create a launch script
python3 -m autopilot.setup.setup_autopilot
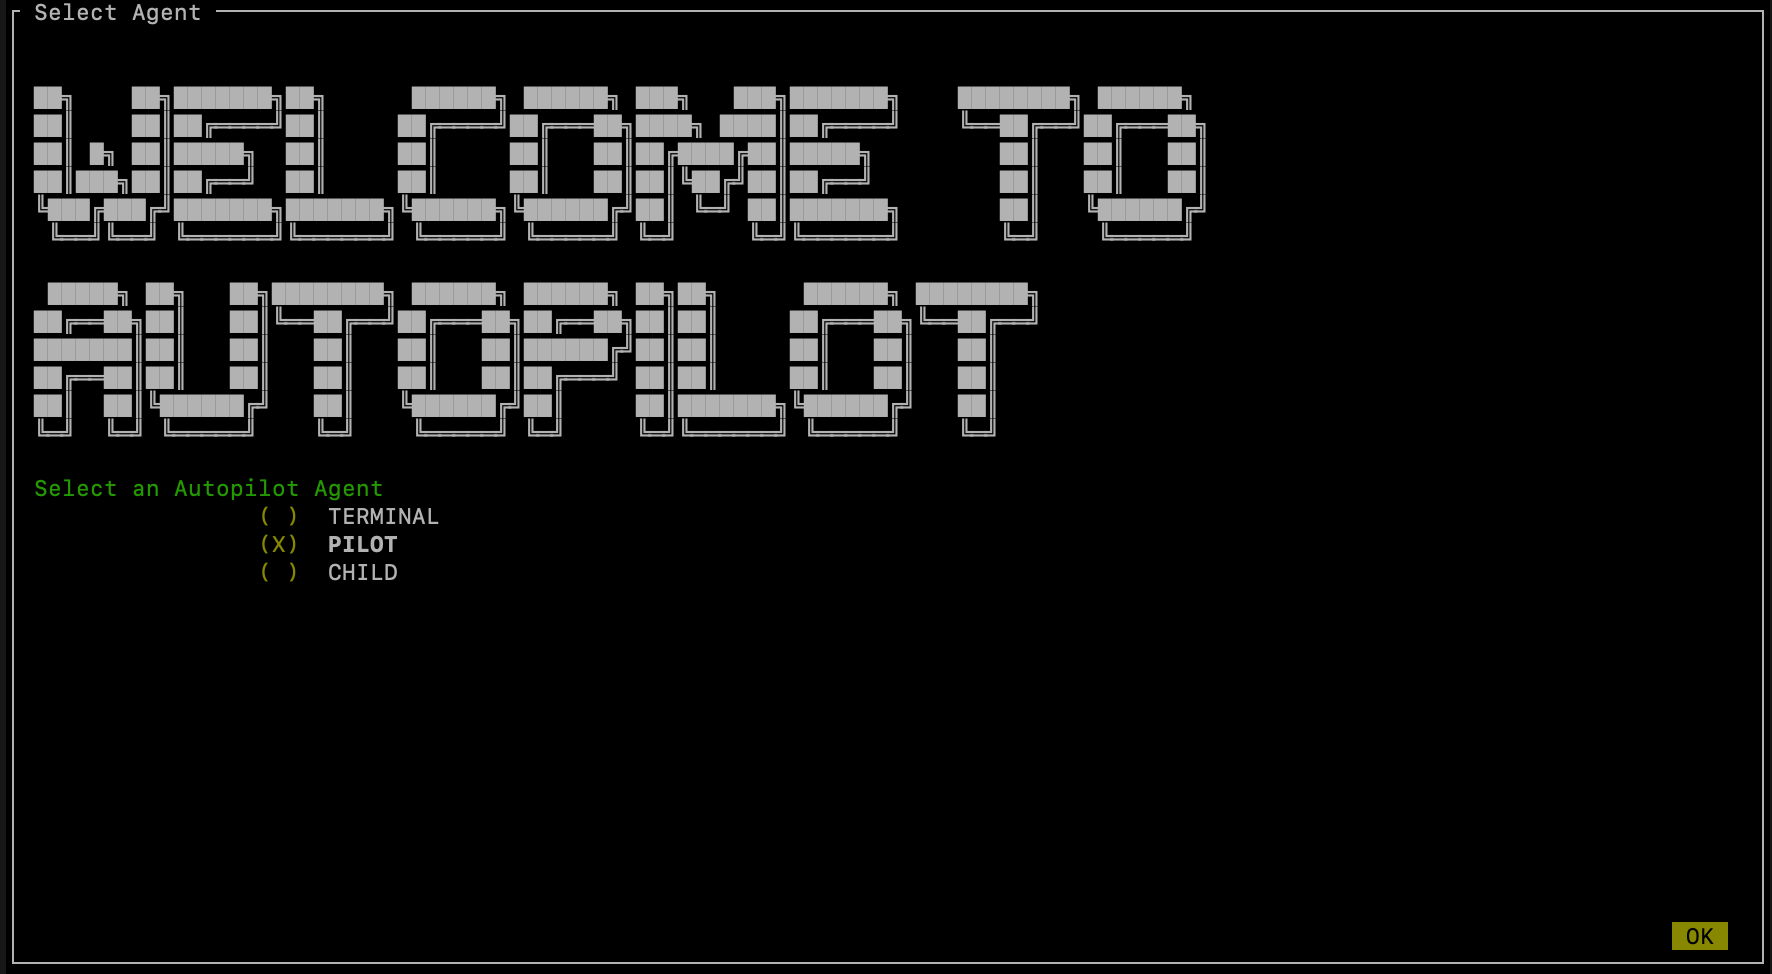
Select agent
Each runtime of Autopilot is called an “Agent,” each of which performs different roles within a system, and thus have different requirements.
Select scripts
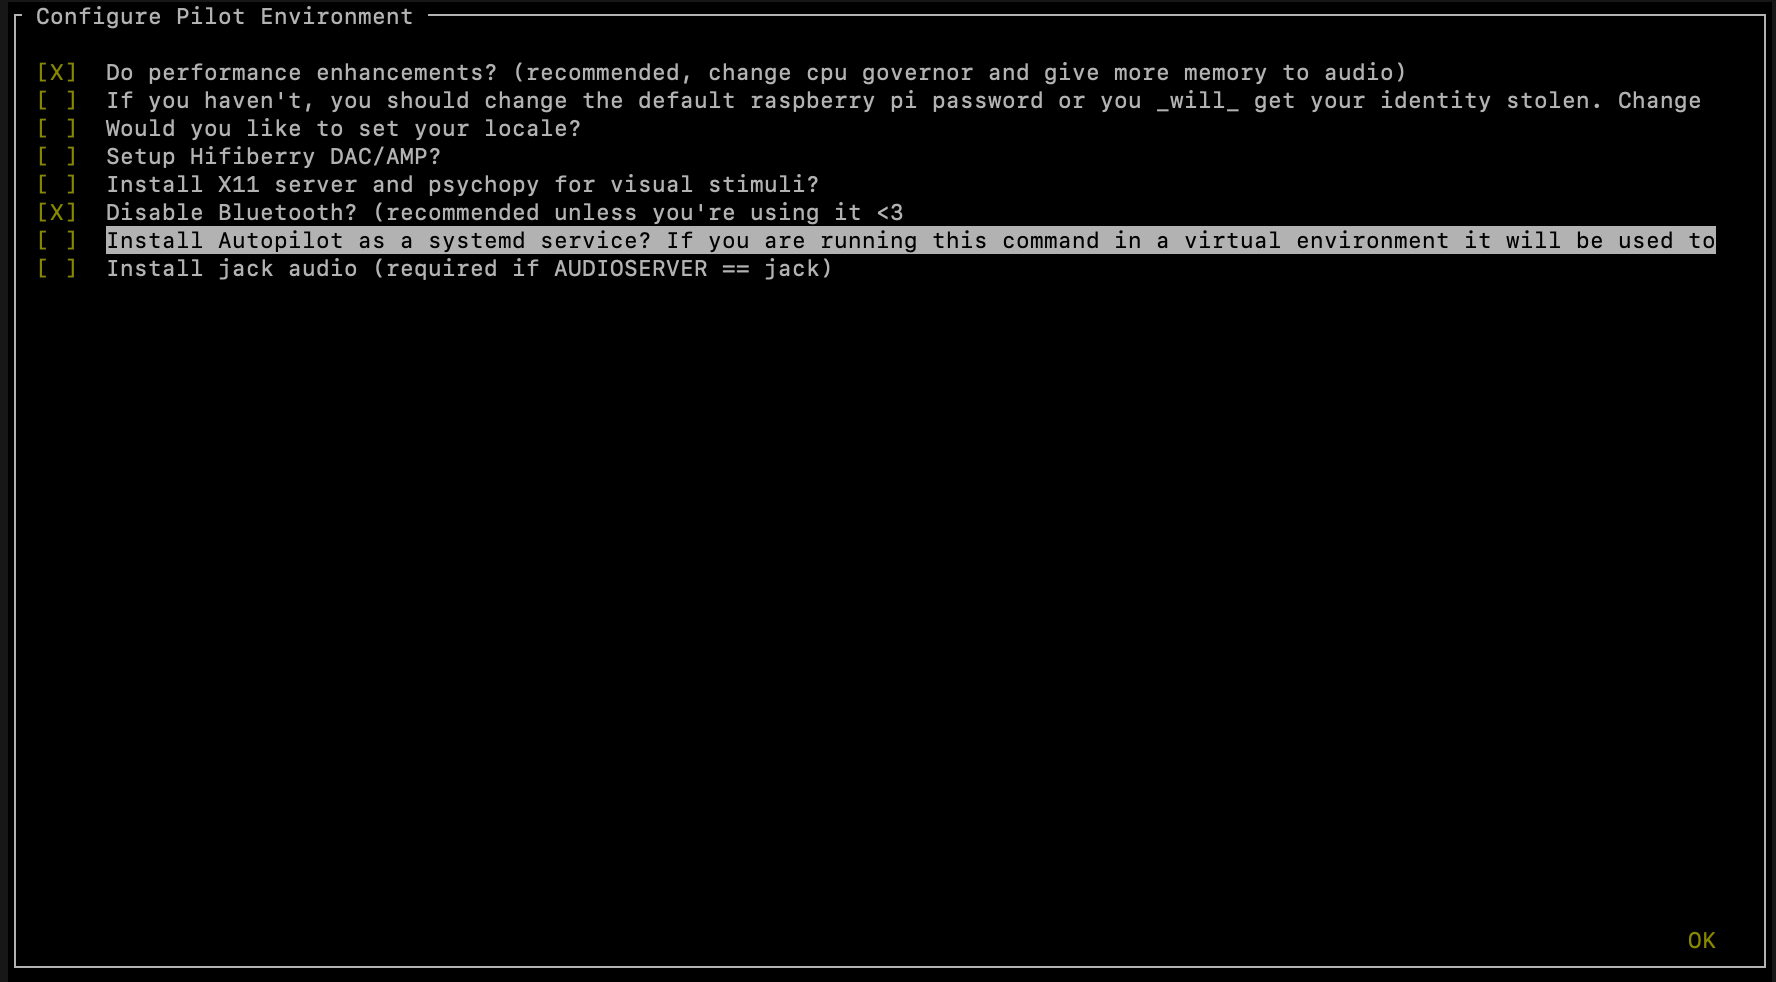
To configure the environment of your agent, autopilot can run a set of scripts (see setup_autopilot.run_script() and setup_autopilot.list_scripts())
Configure Agent
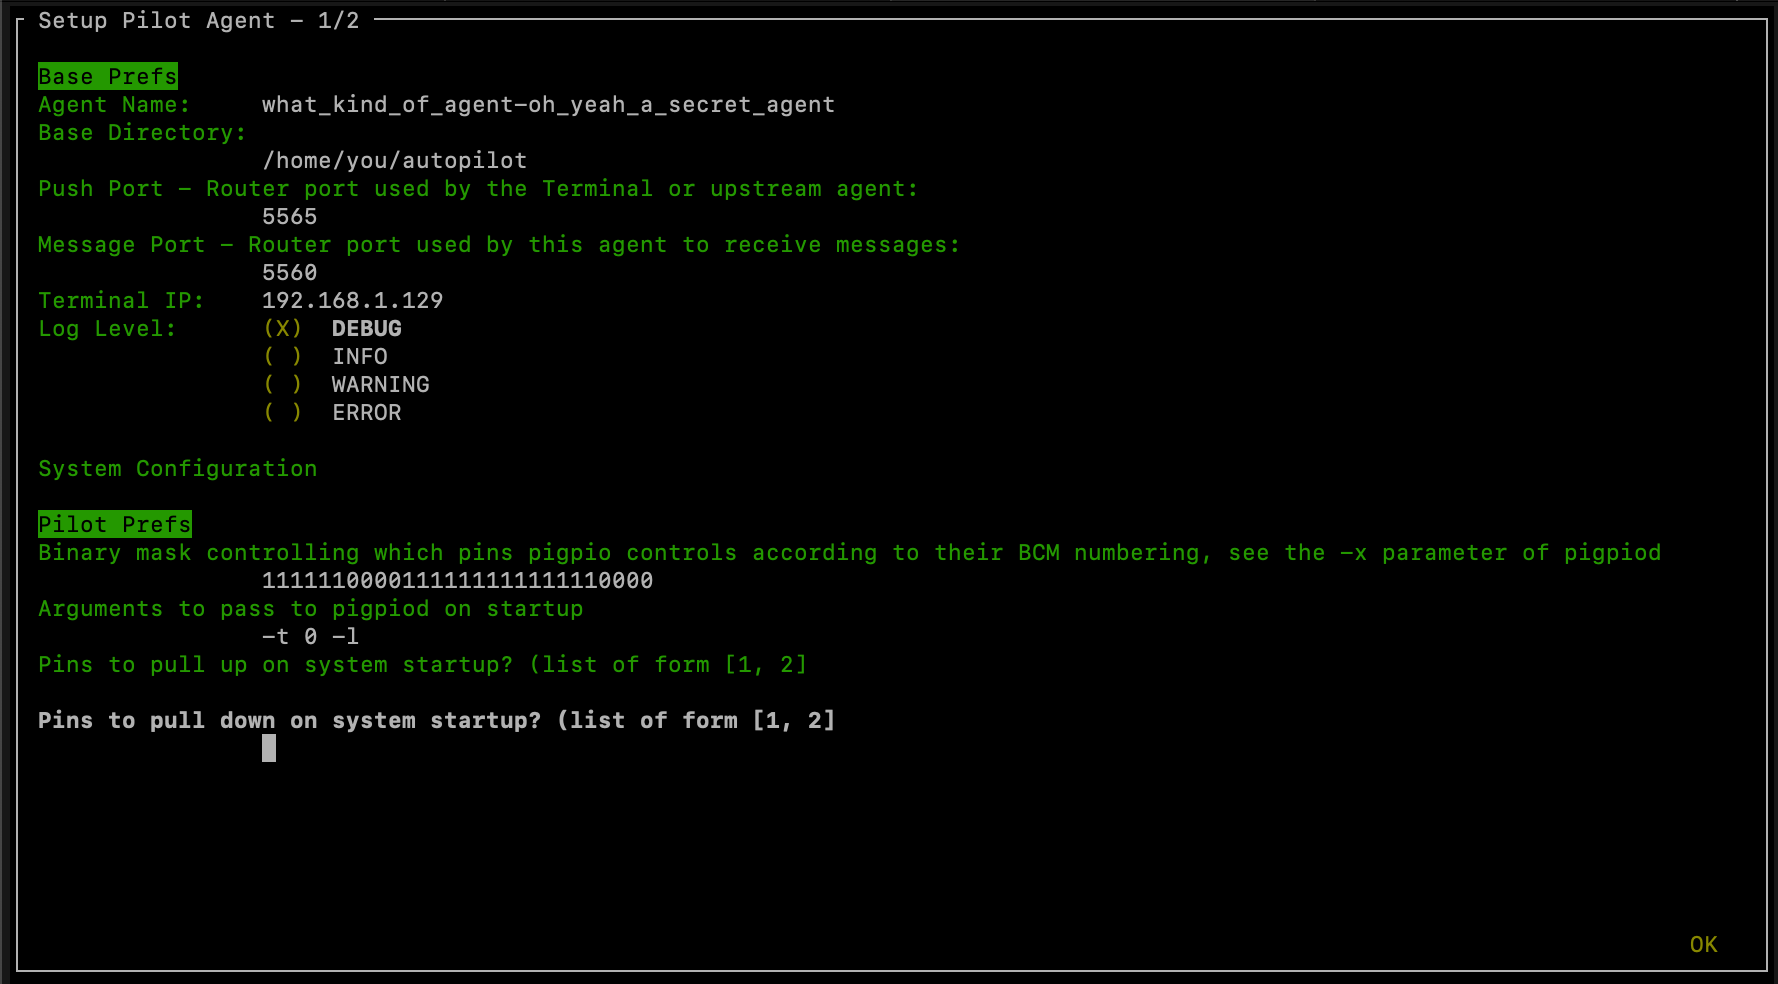
Each agent has a set of systemwide preferences stored in <AUTOPILOT_DIR>/prefs.json and accessible from autopilot.prefs.
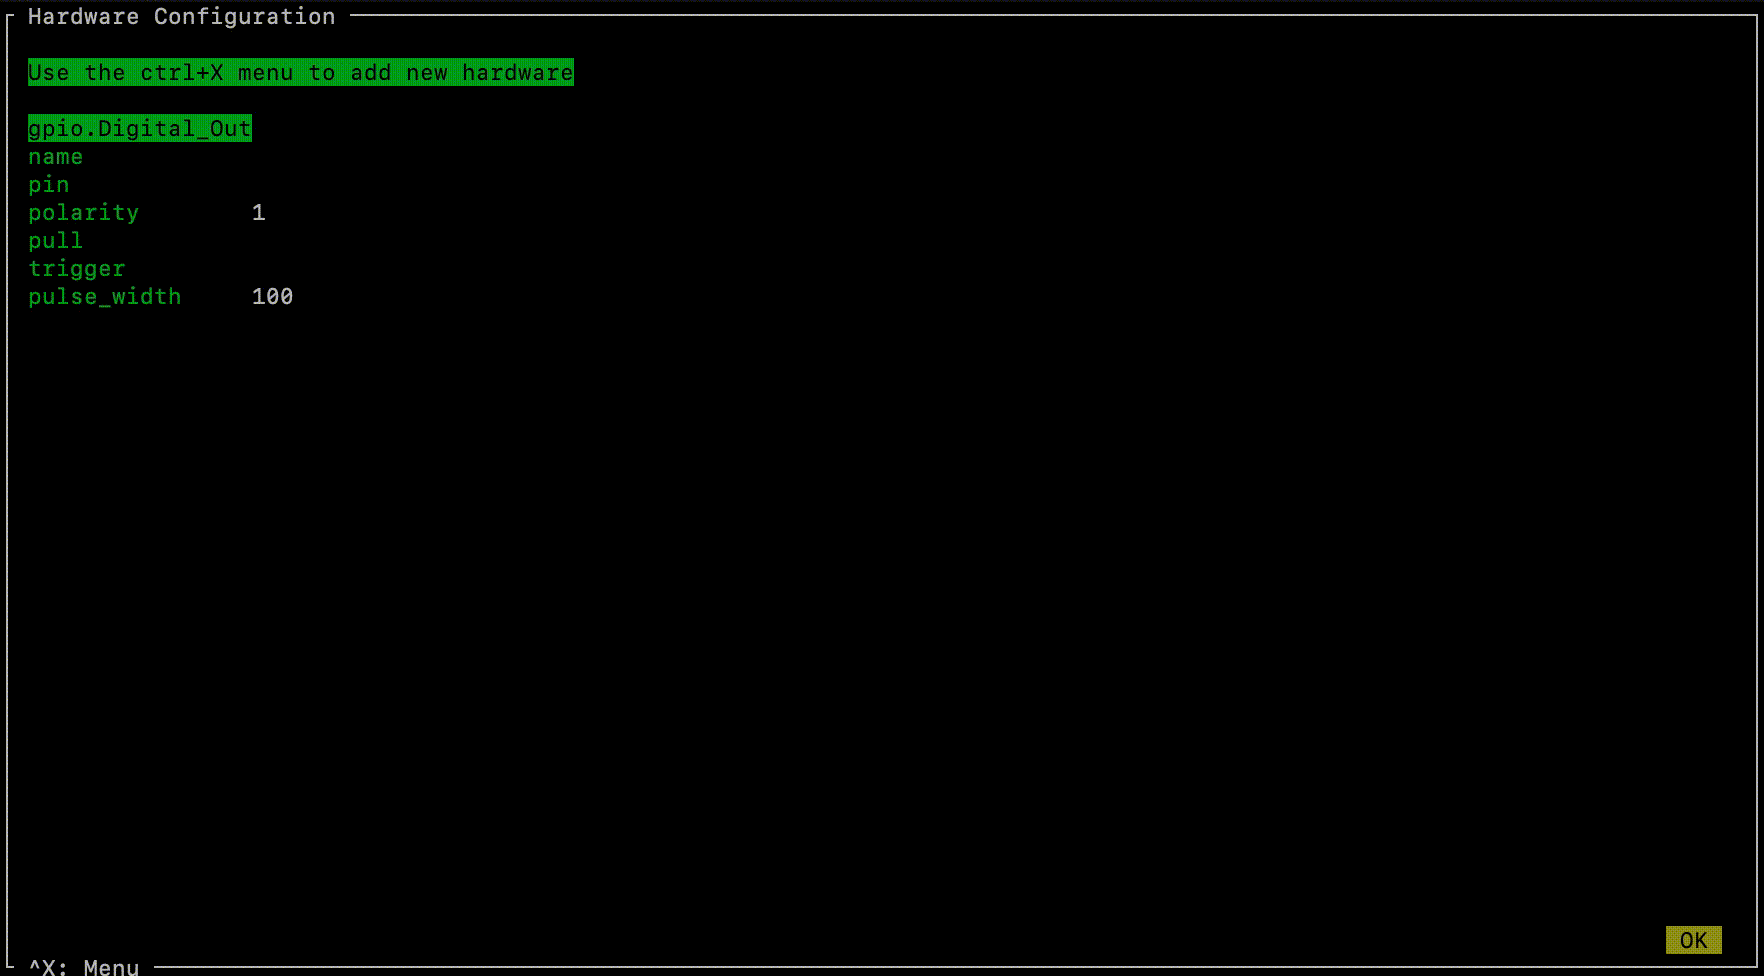
Configure Hardware
If configuring a Pilot, you’ll be asked to configure your hardware.
Press ctrl+x to add Hardware, and fill in the relevant parameters (most are optional and can be left blank)
Supported Systems
Autopilot is linux/mac only, and supports Python 3.7. Some parts might accidentally work in Windows but we make no guarantees.
In particular, the Terminal was designed for Ubuntu, and the Pilot was designed for the Raspberry Pi OS.
We have tried to take care to make certain platform-specific dependencies not break the entire package, so if you have some difficulty installing autopilot on a non-raspberry-pi linux machine please submit an issue!