Writing a Task
Some concepts of task design are also discussed in section 3.1 of the whitepaper.
When you write your own task, you’ll want to do it within your own plugin (see Using Plugins), but until then we’ll take a look at a task written within the main Autopilot Repository. This example is relatively advanced as it is intended to show the full structure of a task. For a more basic example that shows just how to blink a light on and off within a task context, see Blink
Note
For more examples, see the plugins on the wiki, two to get you started:
Autopilot Paper Plugin - Network_Latency: for testing network latency between two pilots, demonstrates:
using a single task for two pilots with different roles,
Point-to-point networking with
Net_NodesUsing the
Terminal_Stationto connect pilots without knowing their IP/Port
Wehrlab Plugin - Nafc_Gap , Nafc_Gap_Laser: Extensions of the Nafc class to do experiments with gaps in continuous background noise, which demonstrate:
Extending the
__init__andendmethods of a task class to do additional things on initialization and teardown – specifically starting and stopping background noiseAdding additional
PARAMS,HARDWAREobjects, andTrialDatafieldsExtending task methods without rewriting them – specifically adding optogentic stimulation to an existing task!
The Nafc class serves as an example for new task designs.
To demonstrate the general structure of Autopilot tasks, let’s build it from scratch.
The Task class
We start by subclassing the Task class and initializing it.
from autopilot.tasks import Task

class Nafc(Task):

    def __init__(self):
        super(Nafc, self).__init__()
This gives our new task some basic attributes and methods,
including the init_hardware() method for initializing the HARDWARE dictionary
and the handle_trigger() method for handling GPIO triggers.
Four Task Attributes
We then add the four elements of a task description:
A PARAMS dictionary defines what parameters are needed to define the task
A Data (
Table) descriptor describes what data will be returned from the taskA PLOT dictionary that maps the data output to graphical elements in the GUI.
A HARDWARE dictionary that describes what hardware will be needed to run the task.
PARAMS
Note
This will be made simpler in the full release of v0.5.0 by using the same data modeling tools as the rest of the library!
Each parameter needs a human readable tag that will be used for GUI elements,
and a type, currently one of:
int: integersbool: boolean (checkboxes in GUI)list: list of possible values in {‘Name’:int} pairssounds: aautopilot.core.gui.Sound_Widgetto define sounds.
To maintain order when opened by the GUI we use a odict rather than a normal dictionary.
from collections import odict

PARAMS = odict()
PARAMS['reward']         = {'tag':'Reward Duration (ms)',
                            'type':'int'}
PARAMS['req_reward']     = {'tag':'Request Rewards',
                            'type':'bool'}
PARAMS['punish_stim']    = {'tag':'White Noise Punishment',
                            'type':'bool'}
PARAMS['punish_dur']     = {'tag':'Punishment Duration (ms)',
                            'type':'int'}
PARAMS['correction']     = {'tag':'Correction Trials',
                            'type':'bool'}
PARAMS['correction_pct'] = {'tag':'% Correction Trials',
                            'type':'int',
                            'depends':{'correction':True}}
PARAMS['bias_mode']      = {'tag':'Bias Correction Mode',
                            'type':'list',
                            'values':{'None':0,
                                      'Proportional':1,
                                      'Thresholded Proportional':2}}
PARAMS['bias_threshold'] = {'tag': 'Bias Correction Threshold (%)',
                            'type':'int',
                            'depends':{'bias_mode':2}}
PARAMS['stim']           = {'tag':'Sounds',
                            'type':'sounds'}
These will be taken as key-value pairs when the task is initialized. ie.:
PARAMS['correction'] = {'tag':  'Correction Trials',
                        'type': 'bool'}
will be used to initialize the task like:
Nafc(correction=True) # or False
Data
Note
Also see the autopilot.data module documentation
There are two types of data,
TrialData- where a single value for several variables is returned per ‘trial’, andContinuousData- where values and timestamps are taken continuously, with either a fixed or variable interval
TrialData is defined by subtypes of the models.protocol.Trial_Data class.
Specify each variable that will be returned and its type using python type hints and pydantic Field description!!:
from typing import Literal
from autopilot.data.models.protocol import Trial_Data
from pydantic import Field

class TrialData(Trial_Data):
    """
    Trialwise Data for a Two-Alternative Forced Choice Task
    """
    # This class allows the Subject object to make a data table with the correct data types. You must update it for any new data you'd like to store
    target: Literal['L', 'R'] = Field(...,
        description="Which side is the correct side this trial")
    response: Literal['L', 'R'] = Field(...,
        description="The side that was poked")
    correct: bool = Field(...,
        description="Whether the subject's response matched the target")
    correction: bool = Field(...,
        description="Whether this trial was a correction trial or not")
    RQ_timestamp: datetime.datetime = Field(...,
        description="The time where the stimulus was presented and the trial was requested")
    DC_timestamp: datetime.datetime = Field(...,
        description="The time when the subject responded")
    bailed: bool = Field(...,
        description="Whether the subject bailed the trial from a timeout or any other reason they did not finish")
Each field has some type (eg correct: bool) as well as an (optional) description inside the pydantic.Field() descriptor.
We use typing.Literal objects to describe when only a certain set of options are allowed (eg. the target can only
be ``L``eft or ``R``ight).
Autopilot’s data modeling tools then use an interface to pytables (data.interfaces.tables ) to create a hdf5 table
description from the high-level description of Trial_Data.
PLOT
The PLOT dictionary maps the data returned from the task to graphical elements in the Terminal’s Plot.
Specifically, when the task is started, the Plot object creates the graphical element (eg. a Point)
and then calls its update method with any data that is received through its Net_Node.
Data-to-graphical mappings are defined in a data subdictionary, and additional parameters can be passed to the plot – in the below example, for example,
a chance_bar is drawn as a horizontal line across the plot. By default it is drawn at 0.5, but its height can be set with an additional parameter chance_level.
Available graphical primitives are registered in the PLOT_LIST, and additional parameters are documented in the Plot class.
Data is plotted either by trial (default) or by timestamp (if PLOT['continuous'] != True). Numerical data is plotted (on the y-axis) as expected, but
further mappings can be defined by extending the graphical element’s update method – eg. ‘L’(eft) maps to 0 and ‘R’(ight) maps to 1 by default.
PLOT = {
    'data': {
        'target'   : 'point',
        'response' : 'segment',
        'correct'  : 'rollmean'
    },
    'chance_bar'  : True, # Draw a red bar at 50%
    'roll_window' : 50    # n trials to take rolling mean over
}
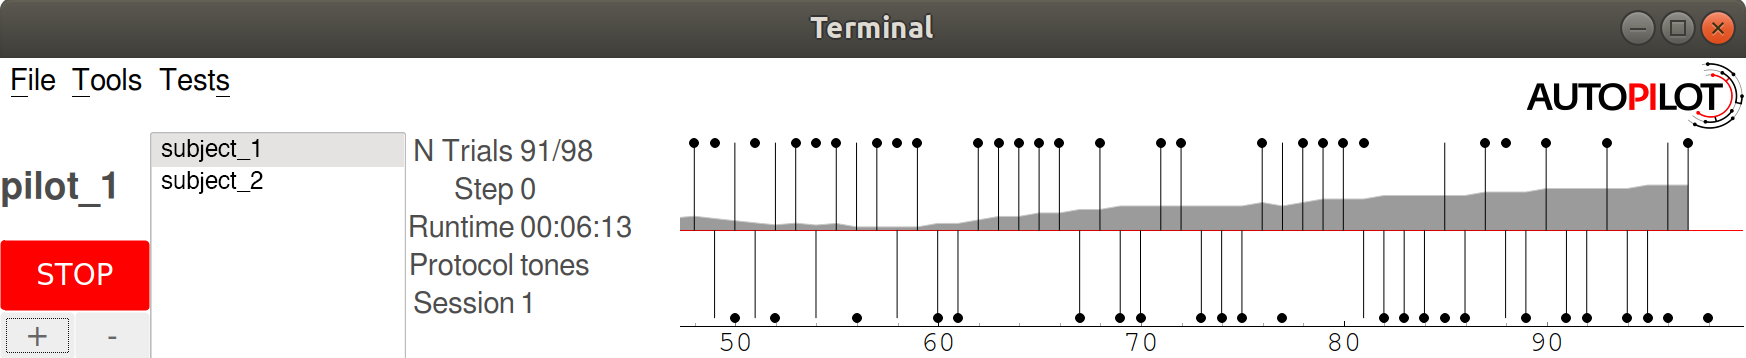
The above PLOT dictionary produces this pretty little plot:
HARDWARE
The HARDWARE dictionary maps a hardware type (eg. POKES) and identifier (eg. 'L')
to a Hardware object. The task uses the hardware parameterization in the
prefs file (also see setup_pilot) to instantiate each of the hardware objects, so their naming
system must match (ie. there must be a prefs.PINS['POKES']['L'] entry in prefs for a task that has a
task.HARDWARE['POKES']['L'] object) – see the Configuration docs for more detail!
from autopilot.hardware import gpio

HARDWARE = {
    'POKES':{
        'L': gpio.Digital_In,
        'C': gpio.Digital_In,
        'R': gpio.Digital_In
    },
    'LEDS':{
        'L': gpio.LED_RGB,
        'C': gpio.LED_RGB,
        'R': gpio.LED_RGB
    },
    'PORTS':{
        'L': gpio.Solenoid,
        'C': gpio.Solenoid,
        'R': gpio.Solenoid
    }
}
Initialization
First, the parameters that are given to the task when it is initialized are stored as attributes, either by unpacking **kwargs…
class Nafc(Task):

    def __init__(**kwargs):
        for key, value in kwargs.items():
            setattr(self, key, value)
Or explicitly, which is recommended as it is more transparent:
class Nafc(Task):

    def __init__(self, stage_block=None, stim=None, reward=50, req_reward=False,
                 punish_stim=False, punish_dur=100, correction=False, correction_pct=50.,
                 bias_mode=False, bias_threshold=20, current_trial=0, **kwargs):

        self.req_reward     = bool(req_reward)
        self.punish_stim    = bool(punish_stim)
        self.punish_dur     = float(punish_dur)
        self.correction     = bool(correction)
        self.correction_pct = float(correction_pct)/100
        self.bias_mode      = bias_mode
        self.bias_threshold = float(bias_threshold)/100

        # etc...
Then the hardware is instantiated using a method inherited from the Task class:
self.init_hardware()
Stimulus managers need to be instantiated separately. Currently, stimulus management details like
correction trial percentage or bias correction are given as separate parameters, but will be included in the
stim parameter in the future:
# use the init_manager wrapper to choose the correct stimulus manager
self.stim_manager = init_manager(stim)

# give the sounds a function to call when they end
self.stim_manager.set_triggers(self.stim_end)

if self.correction:
    self.stim_manager.do_correction(self.correction_pct)

if self.bias_mode:
    self.stim_manager.do_bias(mode=self.bias_mode,
                              thresh=self.bias_threshold)
There are a few attributes that can be set at initialization that are unique:
stage_block - if the task is structured such that the
Pilotcalls each stage method and returns the resulting data, thisthreading.Eventis used to wait between stages – an example will be shown below.stages - an iterator or generator that yields stage methods.
In this example we have structured the task such that its stages (described below) are called in an endless cycle:
# This allows us to cycle through the task by just repeatedly calling self.stages.next()
stage_list = [self.request, self.discrim, self.reinforcement]
self.stages = itertools.cycle(stage_list)
Stage Methods
The logic of a task is implemented in one or several stages. This example Nafc class uses three:
request- precomputes the target and distractor ports, caches the stimulus, and sets the stimulus to play when the center port is entereddiscrim- sets the reward and punishment triggers for the target and distractor portsreinforcement- computes the trial result and readies the task for the next trial.
This task does not call its own stage methods, as we will see in the Wheel task example,
but allows the Pilot to control them, and advances through stages using a
stage_block that allows passage whenever a GPIO trigger is activated. Data is returned from each of the stage methods and is then
returned to the Terminal by the Pilot.
Request
First, the stage_block is cleared so that the task will not advance until one of the triggers is called.
The target and distractor ports are yielded by the stim_manager along with the stimulus object.
def request(self, *args, **kwargs):
    # Set the event block
    self.stage_block.clear()

    # get next stim
    self.target, self.distractor, self.stim = self.stim_manager.next_stim()
    # buffer it
    self.stim.buffer()
Then triggers are stored under the name of the trigger (eg. ‘C’ for a trigger that comes from the center poke).
All triggers need to be callable, and can be set either individually or as a series, as in this example.
A lambda function is used to set a trigger with arguments – the center LED is set from green to blue when the stimulus starts playing.
A single task class can support multiple operating modes depending on its parameters. If the task has been asked to give request rewards (see Training a Subject), it adds an additional trigger to open the center solenoid.
# set the center light to green before the stimulus is played.
self.set_leds({'C': [0, 255, 0]})

# Set sound trigger and LEDs
# We make two triggers to play the sound and change the light color
change_to_blue = lambda: self.pins['LEDS']['C'].set_color([0,0,255])

# set triggers
if self.req_reward is True:
    self.triggers['C'] = [self.stim.play,
                          self.stim_start,
                          change_to_blue,
                          self.pins['PORTS']['C'].open]
else:
    self.triggers['C'] = [self.stim.play,
                          self.stim_start,
                          change_to_blue]
Finally, the data for this stage of the trial is gathered and returned to the Pilot.
Since stimuli have variable numbers and names of parameters, both the table set up by the Subject and
the data returning routine here extract stimulus parameters programmatically.
self.current_trial = self.trial_counter.next()
data = {
    'target'     : self.target,
    'trial_num'  : self.current_trial,
    'correction' : self.correction_trial
}
# get stim info and add to data dict
sound_info = {k:getattr(self.stim, k) for k in self.stim.PARAMS}
data.update(sound_info)
data.update({'type':self.stim.type})

return data
At the end of this function, the center LED is green, and if the subject pokes the center port the stimulus will play and then the next stage method will be called.
The center LED also turns from green to blue when the stimulus begins to play and then turns off when it is finished. This relies on additional methods that will be explained below.
Discrim
The discrim method simply sets the next round of triggers and returns the request timestamp from the current trial.
If either the target or distractor ports are triggered, the appropriate solenoid is opened or the punish method is called.
The trial_num is returned each stage for an additional layer of redundancy in data alignment.
def discrim(self,*args,**kwargs):
    # clear stage block to wait for triggers
    self.stage_block.clear()

    # set triggers
    self.triggers[self.target]     = [lambda: self.respond(self.target),
                                      self.pins['PORTS'][self.target].open]
    self.triggers[self.distractor] = [lambda: self.respond(self.distractor),
                                      self.punish]

    # Only data is the timestamp
    data = {'RQ_timestamp' : datetime.datetime.now().isoformat(),
            'trial_num'    : self.current_trial}
    return data
Todo
pigpio can give us 5 microsecond measurement precision for triggers, currently we just use datetime.datetime.now()
for timestamps, but highly accurate timestamps can be had by stashing the ticks argument given by pigpio to the
handle_trigger() method. We will implement this if you don’t first :)
Reinforcement
This method computes the results of the tasks and returns them with another timestamp.
This stage doesn’t clear the stage_block because we want the next trial to be started immediately after
this stage completes.
The results of the current trial are given to the stimulus manager’s update() method
so that it can keep track of trial history and do things like bias correction, etc.
The TRIAL_END flag in the data signals to the Subject class that the trial is finished
and its row of data should be written to disk. This, along with providing the trial_num on each stage,
ensure that data is not misaligned between trials.
def reinforcement(self,*args,**kwargs):

    if self.response == self.target:
        self.correct = 1
    else:
        self.correct = 0

    # update stim manager
    self.stim_manager.update(self.response, self.correct)

    data = {
        'DC_timestamp' : datetime.datetime.now().isoformat(),
        'response'     : self.response,
        'correct'      : self.correct,
        'trial_num'    : self.current_trial,
        'TRIAL_END'    : True
    }
    return data
Additional Methods
Autopilot doesn’t confine the logic of a task to its stage methods, instead users can use additional methods to give their task additional functionality.
These can range from trivial methods that just store values, such as the respond and stim_start methods:
def respond(self, pin):
    self.response = pin

def stim_start(self):
    self.discrim_playing = True
To more complex methods that operate effectively like stages, like the punish method, which flashes the LEDs and plays
a punishment stimulus like white noise if it has been configured to do so:
def punish(self):
    # clear the punish block to the task doesn't advance while
    # punishment is delivered
    self.punish_block.clear()

    # if there is some punishment stimulus, play it
    if self.punish_stim:
        self.stim_manager.play_punishment()

    # flash LEDs and then clear the block once they are finished.
    self.flash_leds()
    threading.Timer(self.punish_dur / 1000.,
                    self.punish_block.set).start()
Additionally, since we gave the stimulus manager a trigger method that is called when the stimulus ends, we can turn the light blue when a stimulus is playing, and turn it off when it finishes
def stim_end(self):
    """
    called by stimulus callback

    set outside lights blue
    """
    # Called by the discrim sound's table trigger when playback is finished
    # Used in punishing leaving early
    self.discrim_playing = False
    #if not self.bailed and self.current_stage == 1:
    self.set_leds({'L':[0,255,0], 'R':[0,255,0]})